
We can create AMIs in Two ways
- Amazon EBS-backed Linux AMIs
- Instance store-backed AMIs.
1. Creating Amazon EBS-backed AMIs using console :
Start with an existing AMI, launch an instance, customize it, create a new AMI from it, and finally launch an instance of your new AMI.

In Simple words, First Create an Instance with any AMI, and Create an AMI with that.
Step 1&2 – Launch instance with customization :
+ Launching Instance : Go to EC2 > Launch Instance > Add Name and tags > Select AMI, here I selected Amazon Linux (For Detailed Launch instance read previous EC2 Section)
To see all types of AMIs(Marketplace AMI, Community AMI), click on Browse more AMIs
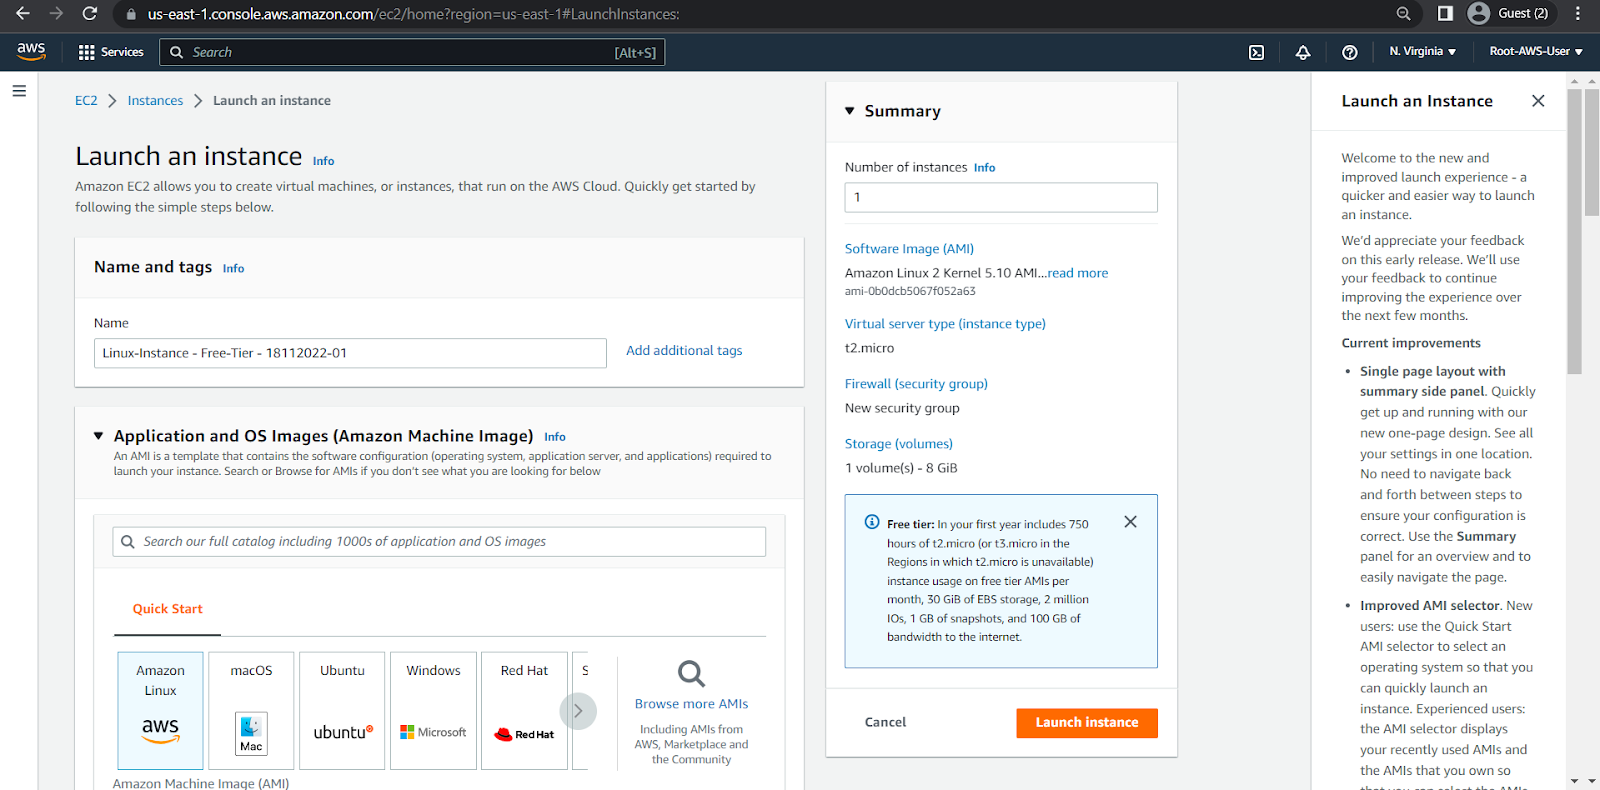
+ Next add Instance type : t2.micro , Keypair : Create new one ,
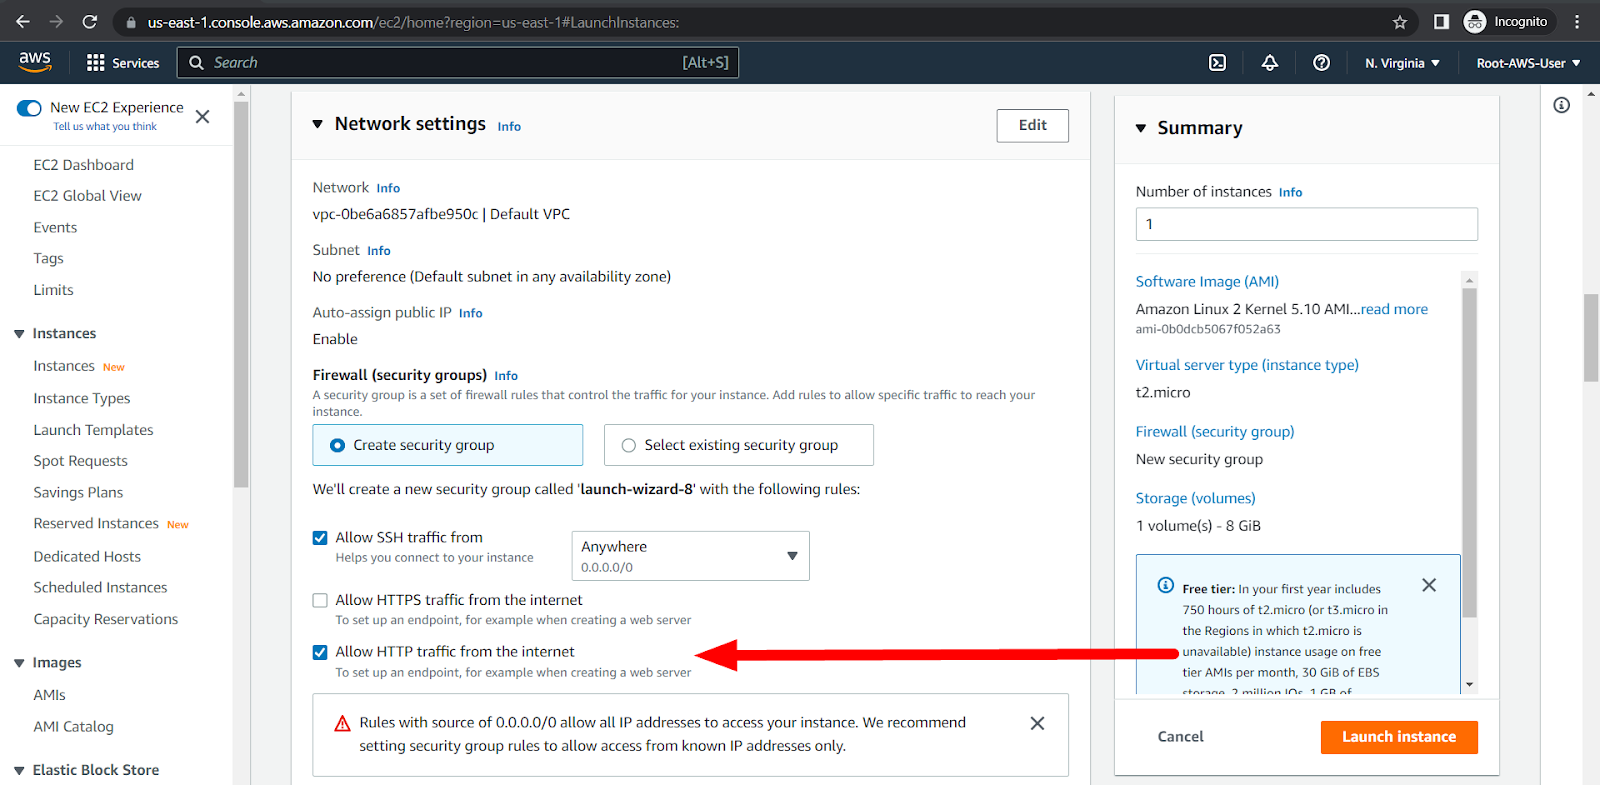
+ Network settings : Keep Default settings add Allow HTTP traffic
+ Configure storage : Default (By default EC2 uses EBS General Purpose (SSD) or Magnetic storage

+ Advanced Setting : add a Script to customize the ec2 instance (here we are adding apache web server in it)

After that, click on Launch instance to create instance.
Step – 3 & 4 : Create image
+ Stop the Image : Select the Instance > Instance State> Stop instance

+ Create image : Select the Instance > Actions > Image and templates > Create image

+ Add Image name , Description, tags after that click on Create image

+ To see the saved AMI: EC2, Images > AMI > Owned by me

+ Check Details : by selecting the AMI
Note : Don’t delete the instance until you see the available status in AMI Details

Steps – 5, 6 :
Launching new instance by using AMI(Owned by me) :
+ Go to EC2, Launch instance – add name and tags ,
+ in Application and OS Images (Amazon Machine Image) : Click on My AMIs, next Owned by me and select the Previously Created AMI (named here CUSTOM-AMI-Linux-Instance – Free-Tier – 18112022-c01)

+ Next, Instance type : t2.micro,
+ Key pair (login) : Create New one (or use existing one if you have that in your pc)
+ Network settings : Tick on Allow HTTPS, HTTP Traffic from internet

Step 7 – Instance Verification :
+ Instance created
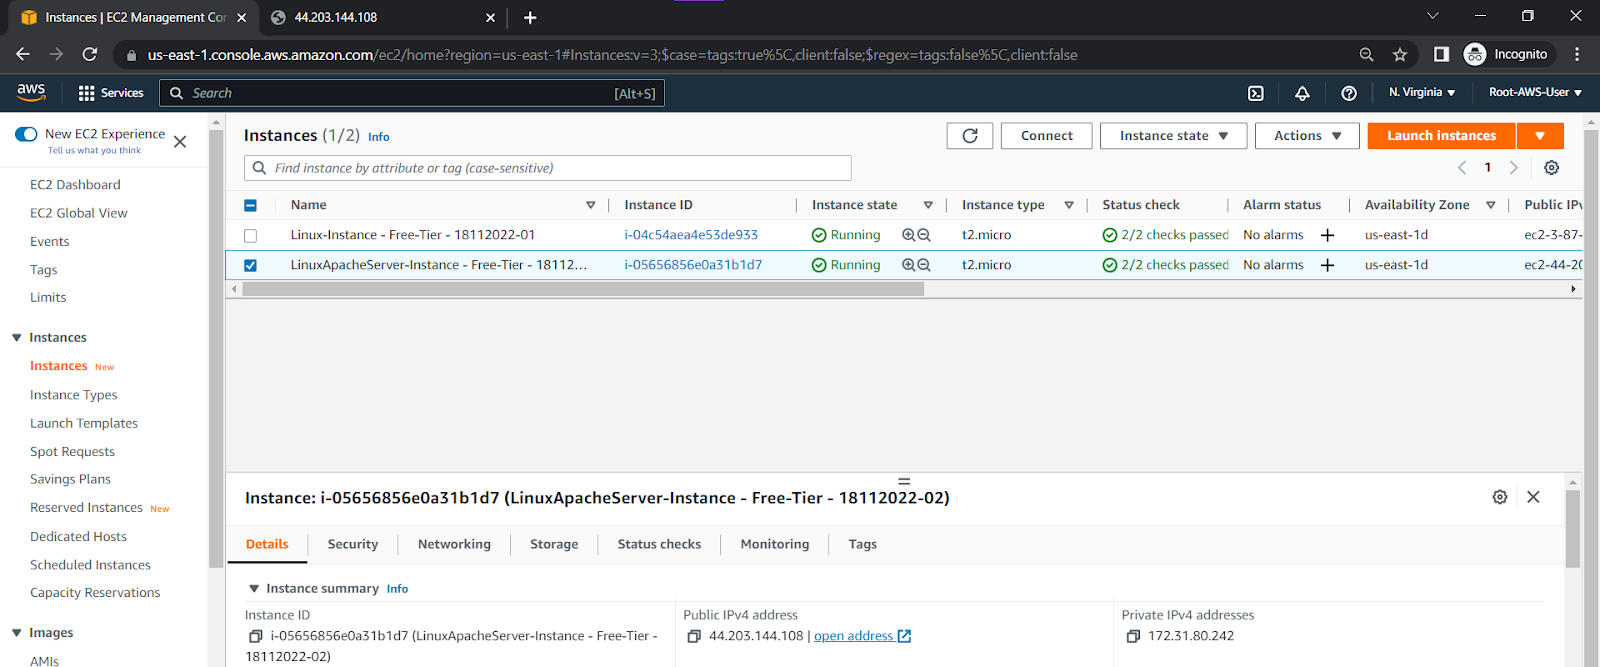
+ Checking web server : its working

Note :1. Whenever the EBS Backed AMI is created then aws will create snapshot that is linked to AMI 2. We can see the snapshot details by clicking on it 2. We can see the snapshot details by clicking on it 3. Keeping an AMI will occupies space (based on AMI EBS Disk size) – so in free tier account 30 GB – free of cost, realtime users need to pay bill4. Deleting AMI : EC2 > AMI > Select the AMI > Actions > Select Deregister AMI 3. Keeping an AMI will occupies space (based on AMI EBS Disk size) – so in free tier account 30 GB – free of cost, realtime users need to pay bill4. Deleting AMI : EC2 > AMI > Select the AMI > Actions > Select Deregister AMI 5. It asks for confirmation and mentions delete snapshot manually : deregistering an AMI, don’t delete the snapshot. User have to delete it. 5. It asks for confirmation and mentions delete snapshot manually : deregistering an AMI, don’t delete the snapshot. User have to delete it.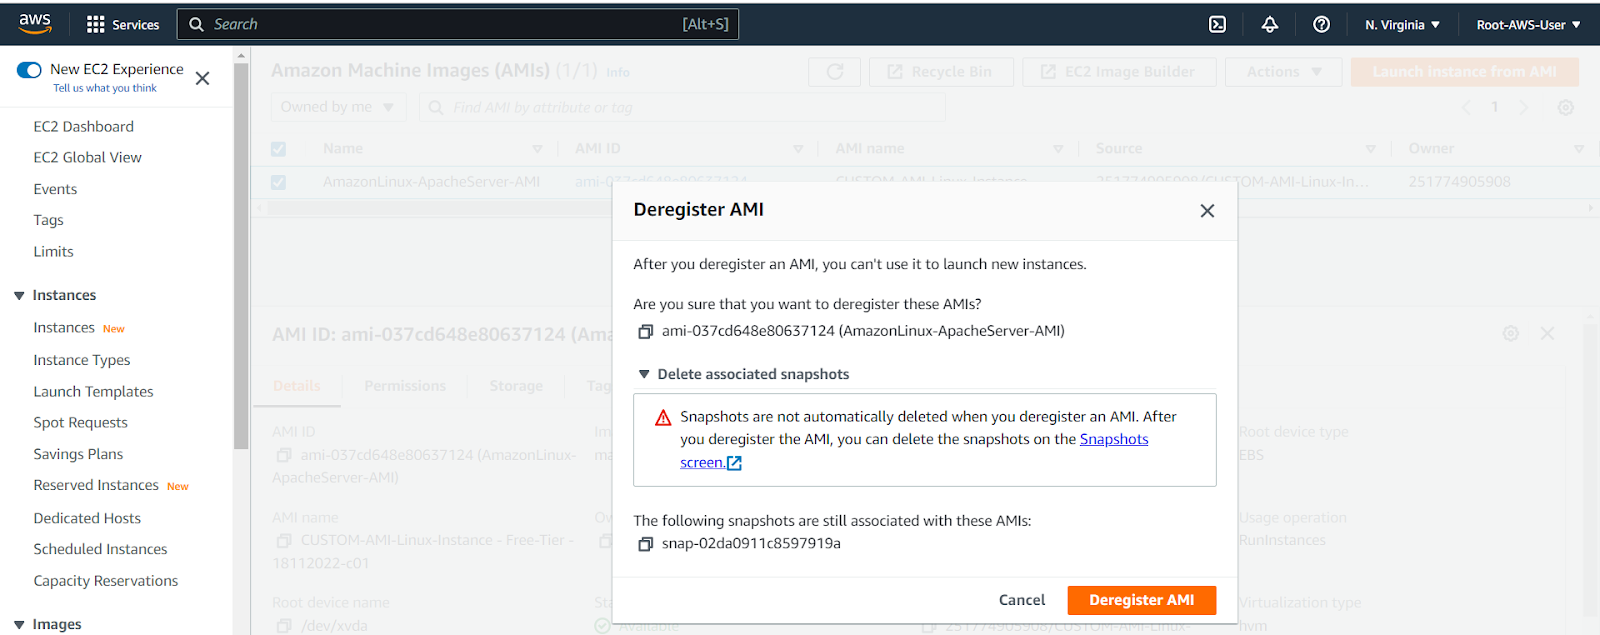 6. Deleting snapshot :by going AWS > EC2 > Elastic Block Store > Snapshot > Select > Actions > Delete snapshot 6. Deleting snapshot :by going AWS > EC2 > Elastic Block Store > Snapshot > Select > Actions > Delete snapshot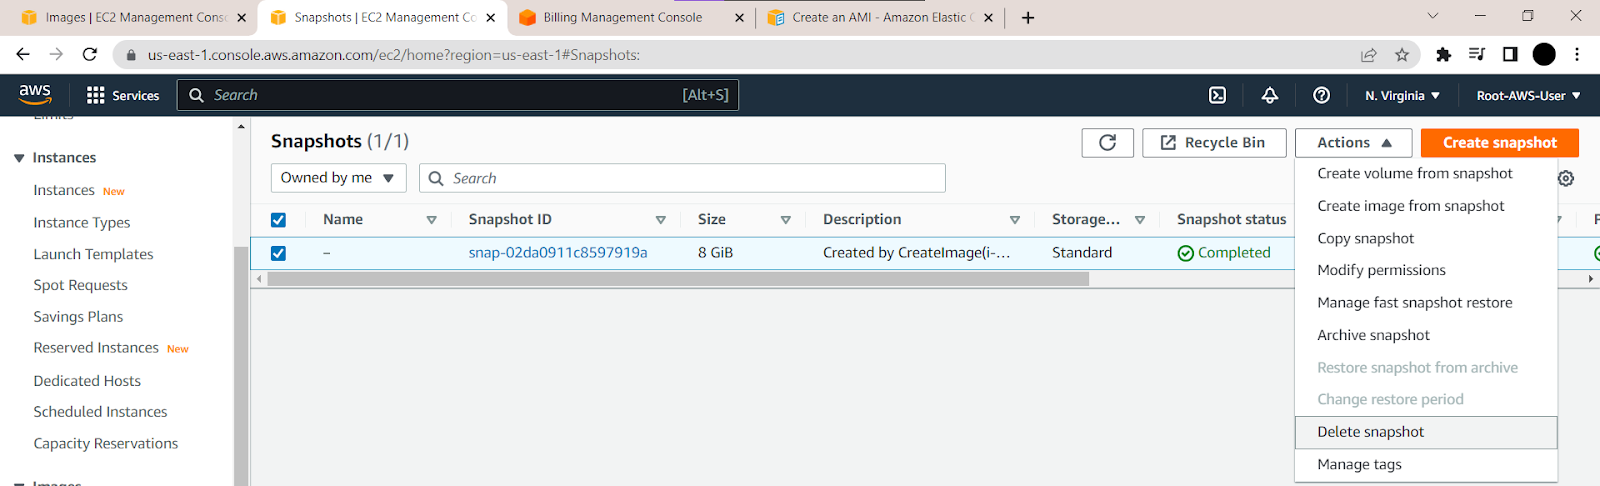 7. If you accidentally/tried to delete a snapshot which is associated to AMI , which is not deleted until user Deregisters the AMI 7. If you accidentally/tried to delete a snapshot which is associated to AMI , which is not deleted until user Deregisters the AMI |
1.2 Creating Amazon EBS-backed AMIs using AWS CLI :
+ To create an AMI from an Amazon EBS-backed instance
| aws ec2 create-image \ –instance-id i-1234567890abcdef0 \ –name “My server” \ –description “An AMI for my server” |
+ To create an AMI from an Amazon EBS-backed instance without reboot
| aws ec2 create-image \ –instance-id i-0b09a25c58929de26 \ –name “My server” \ –no-reboot |